Showing posts with label Baking. Show all posts

Sunday, September 2, 2012

Espresso Buttercream Frosting

Last week we celebrated D's mom's Birthday. We ( D and me ) were rounding up on what cake to make and we were sure about two things: it had to be a chocolate cake with  lots of nuts ( mentioned earlier, as a family we like dry fruits). After going through various frosting recipes, I remembered the Espresso Buttercream recipe by the browneyedbaker that I had bookmarked a while back. The frosting recipe was simple and was a sure shot winner. I followed the recipe step by step, and everyone loved everything about it: the smooth velvety texture of the butter cream, ganache, the filling between the layers of the chocolate cake, in tandem with the occasional bite into a nut! 


Photo courtesy D


Unfortunately I wasn't able to take the pictures of the cake cut into layers (filled with espresso butter cream). I used Cadburys nutties on the top ( for the dry fruits touch) and piped in some chocolate ganache over the espresso buttercream frosting.

Ingredients 


For the Espresso Buttercream Frosting


Butter - 1 cup, 250 ml ( at room temeperature )
Icing sugar - 2 and 1/2 cups
Vanilla essence - 1 and 1/2 tsp
Espresso powder - 1 and 1/2 tsp


Procedure :


For the Espresso buttercream frosting :

Mix the vanilla essence and espresso powder till it dissolves completely.

In a big mixing bowl, start by whisking the butter ( at room temperature ) with a hand mixer for five minutes at medium speed ( Stop in between to scrape the sides ) . Reduce the speed to low and add 1 tbsp of icing sugar and whisk till it gets incorporated into the butter completely. Stop in between to scrape the sides. Repeat the step by adding more sugar and whisking till the sugar gets incorporated and mixed homogeneously . After this stage add the vanilla - espresso mix and again whisk till its gets incorporated into the buttercream fully. The resulting smooth espresso buttercream can be used to spread on cakes/ cupcakes. 


Spread the buttercream on the cake only when its at room temperature . I started by spreading the frosting from the sides to the top and in the end I dipped my spatula in cold water to give the frosting a smooth finish. 
Once you have completed all the decoration on the cake, chill in refrigerator until you plan to serve the same.


Tuesday, October 11, 2011

Baked Sweet Potato Fries

Ah...Here I am, back after 7 months of hibernation from blogging with a dish which I remembered having in a place called Crane Alley (in downtown Urbana).

    
Prep Time - 15 mins
Baking Time - 20 - 30 mins

Ingredients :

Sweet potatoes - 4, medium sized , peeled

Seasoning :

Olive Oil - 1 - 2 tbsp
Garlic - 2-3 flakes, minced ( optional )
Paprika - 1/2 tsp
Black pepper - 1/2 tsp ( or as per taste )
Salt as per taste

15 mins prior to baking :

Soak the sweet potatos in water as soon as you peel them as they tend to get black when exposed to air. Cut the sweet potato into half, cut it into large slices about 3/4th inch thick . Now cut these slices into finger sized fries ( 1/2 inch thick approx ).

Pre heat the oven at 300 F / 150 C.

Procedure :

In a small bowl mix all the ingredients under the seasoning section and keep it aside.
Drain all the water and transfer the sweet potatoes to a large bowl. Pour the seasoning and toss till the sweet potatoes are covered with the seasoning evenly.


Line the baking tray with parchment paper and spread the sweet potatoes in a single layer. Bake until the sweet potatoes are tender and golden brown. ( Ten minutes into baking take out your baking tray from the oven and turn the fries ).

Serve warm with your favourite sauce!

Wednesday, December 15, 2010

Eggless/ Vegetarian Strawberry Cheesecake With Chocolate Ganache

 We celebrated D's birthday on 10th December with friends. For his special day I decided to make Strawberry Cheesecake with Chocolate Ganache, and this rich festive cake was my way of showing him that he is very special . Thank you for making my every passing day a memorable yesterday !


I had set my eyes on a cheesecake long time back, but all the recipes called for using either eggs or gelatin .
[ Cheesecakes that require baking use eggs, whereas the " no bake " cheesecakes use gelatin to firm them up ]. Us being staunch vegetarians, I decided that I would figure out a way to make my cake egg/gelatin less. Then I stumbled upon Rosemarie Emro's cheesecake recipe called  "I cannot believe it has no eggs cheesecake " [ where she replaces the eggs with condensed milk]. I followed her recipe for a basic cheesecake and then made my own minor changes to it. The resulting cake was super creamy, dense and undoubtedly rich with a slight tart of strawberries and a must try at home.

Since I was new to making cheesecakes I did some research and would like to share my notes on the same, they are as follows :

1. Springform Pan - Cheesecakes are very soft and somewhat fragile and not the type of cake you can turn out of a pan. This calls for using a springform pan, where you can lift away the sides and leave the cake on pan's base for serving!

2.Avoid overbeating the cream cheese batter as it tends to incorporate air which in turn could cause the cheesecake to crack.

3.For best results pre bake the crumb crust for 10 mins before baking the crust along with the cake.

4.Unmolding the cake - The best way for removing the cake from the springform pan , is by running a blunt knife ( dipped in hot water and wiped before use ) around the cake in an up down motion.

5. Just like baking, cooling ( at room temperature) and the chilling in a refrigerator are important steps in making a cheesecake.

6. The cheesecakes have a tendency to crack, baking the cheesecakes in double boiling method prevents it from cracking and  I followed this method. But since the recipe uses corn starch ( corn starch prevents coagulation , which in turn prevents the cake from cracking ) double boiling is not required.


I hereby present the full recipe

Prep Time : 30 mins
Baking time : 1 hr 30 mins
Inactive setting time : 12 - 18 hrs

Ingredients :

For the Crust :

Chocolate graham crackers - 20 - 25 pieces ( should yield 1.5 cups when crushed into crumbs )
Melted unsalted butter - 1/2 cup
Fine sugar - 2 tbsp

For the Cheesecake Filling :

Regular cream cheese - one 8 ounce package (226 gms)
Low fat cream cheese - two 8 ounce package (= 16 ounces )
Pureed fresh strawberries - 1 cup
Sweetened condensed milk - 1/2 cup
Fine sugar - 1/2 cup
Baking soda - 1/4 tsp
Baking powder - 2 tsp
Cornstarch - 1/4 cups
Lemon juice - 1 tbsp
Grated lemon rind - 1/2 tsp
Vanilla extract - 1 tbsp
Light sour cream - 16 ounces

For the Chocolate Ganache :

Heavy whipping cream - 186 ml
Semi- sweetened chocolate - 8 ounces [ I used Baker's brand ]
Butter - 2 tbsp

One hour prior to preparing : Bring the cream cheese at room temperature by taking it out from refrigerator.

Procedure :

Grease the springform pan with butter. Choose a pan that has sides atleast 3 inches high.


Crust :

In a medium sized bowl break the graham crackers into small pieces using your fingers.  Powder the pieces in a blender. Mix the cracker crumbs with melted butter and sugar until all of the crumbs are uniformly moist. ( I did this with my fingers )  Turn the ingredients into the springform pan.


Use a flat surfaced bowl to pat an even layer of crumbs over the bottom of pan and halfway up the sides.
Its okay if the sides are not perfectly even.


Place the wire rack in the centre slot in the oven and preheat the oven at 350 F. Put the springform pan with the crumb layer in the freezer while you preheat the oven. After 10 mins place the springform pan in the oven and bake for 10 mins. Remove from the oven and set it aside.


Reduce the oven temperature to 325 F. Put a kettle of water on boil. Wrap the bottom and sides of the the springform pan with double layers of aluminum foil.

Cheesecake filling :


In a large bowl , with a handheld electric mixer on low speed, beat all the cream cheese and condensed milk together. Slowly add in sugar, baking soda, baking powder, corn starch , lemon juice, lemon rind and vanilla essence. Mix till you get a homogeneous mixture. Pour in the pureed strawberries and beat until you get a smooth mix.  Mixing of all the ingredients mentioned above should take approx 3 minutes. Do not over beat the mixture. At this stage add sour cream and blend at the lowest speed till you get a smooth mixture. Pour this mixture into the prepared pan. The batter will reach just below the top rim of the pan.


Baking: 

Now place the foil wrapped springform pan on a baking sheet that is large enough to hold the pan with some space around it. Pour enough boiling water around the pan.

Place this whole set up in the centre rack of the preheated oven. Bake for 1 hr and 30 mins .


Its difficult to gauge when a cheesecake is done as it will never appear like its done. Switch off the oven when your cheesecake appears set and the centre is wobbly.

[ The cake would first rise above the rim, then go down and the top layer would appear brown. As soon as you see the above changes in your cheesecake be alert and hit the rim of the springform pan with a big spoon, if the whole cake looks wobbly heat for some more time. Whereas if the sides look set and the centre still looks wobbly ( when you hit the rim slowly with a big spoon ) switch off the oven ]

The whole process took me about 1 hr and 30 mins. This time would vary depending upon the oven capacity.

Let the springform pan sit inside the oven for one more hout after it is switched off. After 1 hour , carefully pull out the set up from the oven. Remove the foil from the sides of springform pan and let the cheesecake come to room temperature.

Once when the cake reaches room temperature, cover it with a saran wrap ( or any plastic wrap ) and refrigerate overnight ( or 6-7 hrs minimum ).

After the cake has been chilled overnight, remove the sides of springform pan by running a blunt knife ( dipped in hot water and wiped) to separate the cake from the side walls of the pan and unlocking it.


Chill it again while you prepare chocolate ganache.

Chocolate Ganache :

 Chop the chocolates as finely possible and place them in a stainless steel bowl.

In a strong bottomed pan, heat butter and whipping cream on medium heat till they start to boil. Switch of the heat and pour the boiling whipped cream - butter mix over the chopped chocolate. Let it rest for 2 mins. Using a whisk mix the chocolate and whipped cream mix till you get a smooth shiny mixture.

Take out your cake from the refrigerator and place it over a butter paper (the ganache might drip). The top layer of the cheesecake might not be even, so to make the top layer smooth spread 2 tbsp of the ganache on the crumbly spots with a rubber spatula. Refrigerate the cake with the crumb coat for 5 mins.
After 5 mins when you take it out , you would have a smooth surface to work on.Now pour the  remaining ganache in the centre and spread quickly with a rubber spatula over the sides of the cake evenly.


Refrigerate the cheesecake with chocolate ganache for 2-3 hrs.[ Refrigerating the cake with the ganache for more than 2-3 hrs might make it dull without glaze, so prepare it just before 2-3 hrs of serving your cake! ]


Happy Birthday again D!

Tuesday, December 7, 2010

Garlic Bread

I have always tried and wanted to make restaurant style garlic bread. Even though I have made it a number of times, the results were not very satisfactory. D suggested we make it the way described below, apparently he had  tasted something quite similar during a recent trip. This one turned out very much like what we had thought of and we enjoyed it a lot. 

A crispy edge and a warm soft, buttery and cheesy centre - it is this quality of garlic bread that I have been trying to make and it became a success this time. Traditionally a garlic bread is made from French bread / Italian bread, but we prefer Vienna bread which has a crispy crust on the outside and a very soft inside, which turns out to be perfect for garlic bread! Also one of the other important things while making a garlic bread is that the oven in which you plan to bake your garlic bread needs to be really hot, so its better that you preheat your oven 15- 20 mins before you plan to bake it. 


Prep time - 10 -15 mins
Cooking time - 10 - 12 mins

Ingredients :

Vienna bread  loaf- 1 medium sized loaf ( You can also use French / Italian bread loaf )
Garlic pods - 5-6 medium sized pods, minced or very finely chopped
Butter - 1/3 cup [ or more as per taste ]
Mozzarella cheese - 1/2 cup grated [ or more as per taste ]
Dried basil leaves - 1 tsp [ or as per taste ]
Salt - as per taste

For veggie Garlic bread :

Onions - finely chooped
Tomatoes - finely chopped

Procedure :

Pre heat the oven at 400 F.

Take the Vienna bread and carefully slice it into half lengthwise.


Now cut these halves into two half pieces and slit each piece as shown in the picture below , without cutting the edges below. Melt the butter and apply generously over each piece like in the pic below. Place the bread pieces on cookie sheet.


For plain garlic bread :

Spread the mozzarella cheese over the bread  and top it off with minced garlic, salt and basil leaves.

For veggie garlic bread :

Spread a little amount of mozzarella cheese over the bread. Add the chopped tomatoes and onion and sprinkle more cheese generously. Top it off with minced garlic, salt and basil leaves.


Place the cookie tray in the oven and bake till the cheese melts and the top layer turns golden brown. This would take 10-12 mins approx.


I did not add oregano and chilli flakes while baking. You can add both the seasonings before serving. Serve hot.


Sunday, November 7, 2010

Eggless Dates and Walnut Cake

Today Nov 7th is my father in law's birthday and we are celebrating this special occasion with an eggless dates and walnuts cake. Happy birthday Boppi - from D and me. Thank you for all the loving things that you have done for us!

Though I have made this cake before, the cake turned out real soft this time.I think it mainly happend because :

1. I just used baking soda this time [ last time I added both baking soda and baking powder ].
2. I soaked the dates in milk for an hour. [ I am not sure if this really helped in making the cake soft].

Unlike before I did not add vinegar to this cake.[ Though I was contemplating about adding a tbsp of apple cider vinegar I chose to go ahead without it]. The cake raised close to one and half inches which made it look real sof and fluffy.


Inactive prep time - 30 mins
Active prep time - 10 mins
Baking time - 30 - 40 mins

Ingredients :

All purpose flour - 1 cup
Sugar - 3/4 cup
Dates - 12 ( or upto 18 nos depending on your taste )
Milk - 1 cup
Melted butter - 1/4 cup
Baking soda - 1 tsp
Salt - 1/8 tsp
Walnuts - 2 tbsp, broken

Procedure :

Soak the dates in milk half an hour prior to baking [ If in hurry soak the dates in warm milk for 15 mins. You can completely avoid this step, soaking helps in softening the dates which in turn gets grounded easily in a blender].

Preheat the oven at 350 F and grease a baking pan.

In a big bowl mix all purpose flour, baking soda and salt properly.

In another bowl keep the melted butter ready. Blend together dates, milk and sugar to a smooth paste. Pour and mix this mixture with the butter and mix till you get a homogenous mixture.

Make a small well in the centre of all purpose flour and slowly pour in the dates mixture . Mix properly without any lumps. [ Do not use a hand mixer, just stir everything with a large spoon. Over mixing an eggless batter will cause the cake to deflate after it is baked ].


Add in the broken walnuts and give the batter a final mix. Pour the batter in the baking pan and bake for 30 - 40 mins or till tooth pick inserted comes out clean. The color of the cake depends on the dates used.


Happy Birthday to my Father in law!!!

Wednesday, October 27, 2010

Eggless Cherry Chocolate Cake ( Melted Chocolate )

Today 27th October is my inlaws' 30th Wedding Anniversary and we celebrated this special occasion with a decadant chocolate cake. Both D and me would like to convey our heartfelt wishes for a very Happy Wedding Anniversary. We wish many many more years of companionship, to you Amma and Appa.

Sometime back, I got a cherry chocalate cake (this was not eggless) from store. I liked this combination, but never got a chance to research on how this is made. Recently I went through some websites that suggested making cakes (not this particular one) using melted chocolate. So I came up with this recipe, an eggless one, made with melted dark chocolate and cherries. It turned out really rich, and I simply loved this chocolate-cherry combination. D's reaction to this cake was... Goooood!


Prep time - 30 mins
Baking time - 40 - 50 mins

Ingredients :

All purpose flour - 2 cups
Dark chocolate bar - 16 oz / 454 gms [ I used Hershey's dark chocolate ]
Maraschino Cherries - 16 oz / 454 gms
Baking powder - 2 tsp
Baking soda - 1 tsp
Apple cider vinegar - 2 tbsp
Vanilla essence - 2 tsp
Walnuts - 3 to 4 tbsp, roughly crushed
Butter - 1/3 cup [ recommended 1/2 cup ]
Powdered sugar - 1/2 cup [ or as per taste ][ I used fine sugar]
Salt - 1/8 tsp
Milk - 1/4 cup

Procedure :   

Wash maraschino cherries in water thoroughly. De-seed them ( if required ) and break them into small pieces.

Mix all purpose flour, baking soda, baking powder and salt and mix properly. Keep aside.

Melt butter and add in the sugar, apple cider vinegar, vanilla essence and mix properly. Keep aside.

At this stage break the dark chocolate into small pieces.


Transfer into a microwaveable bowl and microwave it at short intervals of 20 seconds, ( stirring every 20 second ). In exactly 1 minute I had the melted chocolate without any lumps.

 
Slowly mix this melted chocolate with the butter - sugar mixture and whisk / stir till the melted chocolate gets fully incorporated into the butter. Add this chocolate mix into the flour and mix properly without any lumps.

 
[ Do not use a hand mixer, just stir everything with a large spoon. Over mixing an eggless batter will cause the cake to deflate after it is baked ].


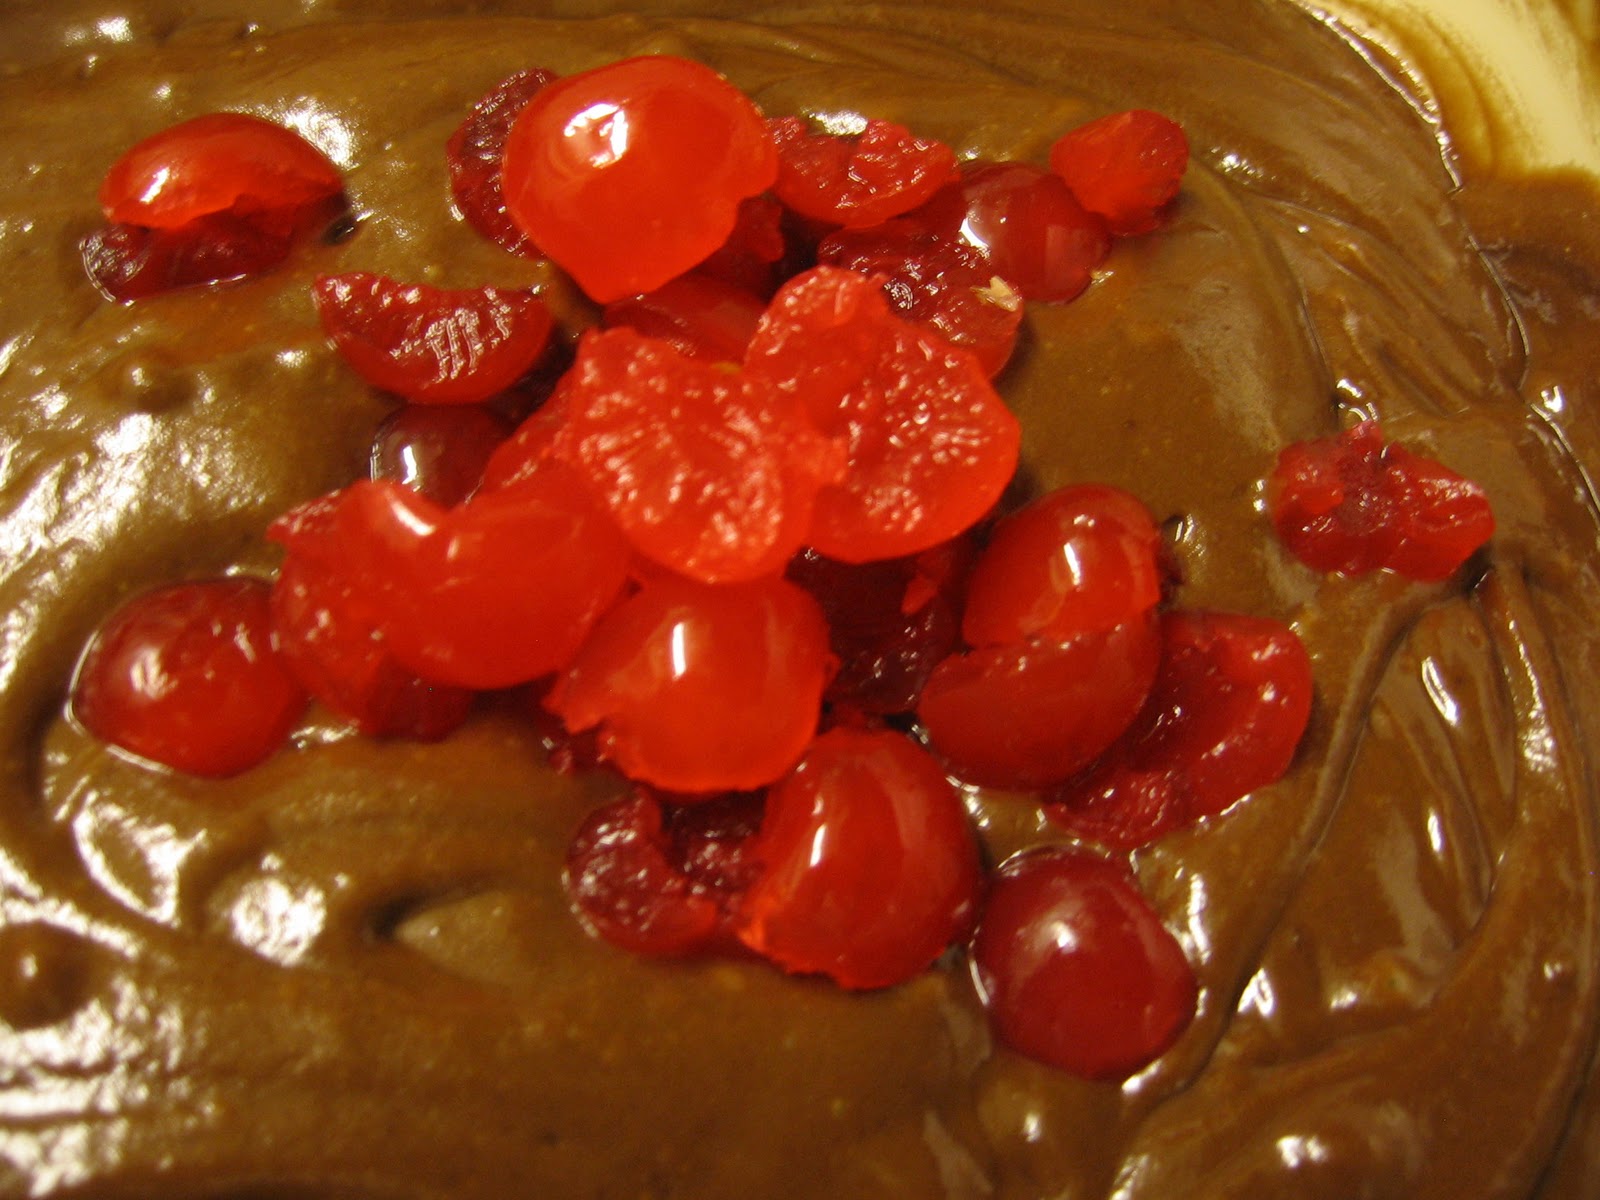
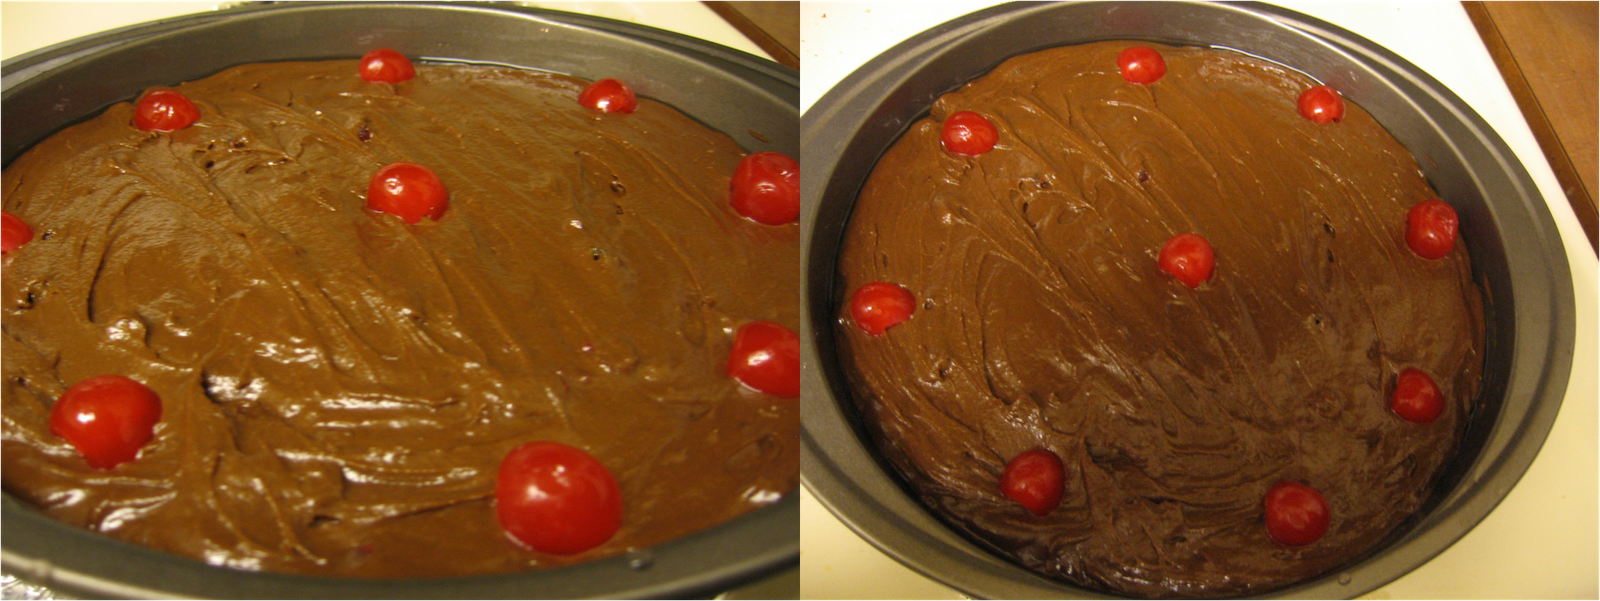
Add milk if you feel that your batter is too thick and mix properly. At this stage add in the cherries and walnuts and mix slowly and properly. [ Keep a few cherries aside for decoration ].

Pre heat the oven at 350 F and grease the baking pan with oil. Pour the batter into the baking pan and decorate with the remaining cherries.


Bake for 40 - 50 mins or till the tooth pick inserted comes out clean.


Flip the cake after 10 mins while the cake pan is still warm . The chocolate cherry cake is ready !


Happy Anniversary  to Amma and Appa!!!

Note - The cake was a bit crumbly, so I would suggest adding 1/2 cup or more butter instead of just 1/3 cup.

Tuesday, October 19, 2010

Eggless Blueberry Coffee Cake

Today 19th October, is my mom's birthday and we are celebrating her birthday with a blueberry coffee cake, wish we were with her to share the cake. Happy Birthday Amma - from D and me. Thank you for your endless affection and I cherish the very special bond we have.


Coffee cake need not contain coffee. This term can also be used in connotation to cakes served with coffee/ tea. These are usually flavoured with fruits, nuts and cinnamon.

This cake definitely has a place in my list of favorites.The cake is really light and soft and is quite rich in its flavors ( of cinnamon and blueberries). Enhanced with the crunchiness of baked almonds, we ended up eating half of the cake within couple of hours.
 I used about 3/4 cup of sugar and with the blueberries the sweetness was just perfect. You can go upto 1 cup of sugar if you want more sweetness.

The recipe is as follows :

Prep time : 10 mins
Baking time : 50 mins

Ingredients :

All purpose flour / Maida - 2 cups
Blueberries - 1 cup [ I used frozen and didn't thaw ]
Sugar ( white ) - 3/4 cup [ or one cup as per taste ], [ I used fine sugar, if not available use powdered sugar ]
Melted butter - 1/3 cup
Almonds - 1 cup, sliced
Cinnamon powder - 1/4 tsp
Baking powder - 1.5 tsp
Baking soda - 1 tsp
Milk - 1 cup + 1/4 cup ( additional, if required )
Apple cider vinegar - 1 tbsp
Vanilla essence - 1 tbsp
Brown sugar - 1.5 tbsp
Salt - 1/2 tsp

Procedure :

In a small bowl mix almonds, brown sugar and cinnamon and keep it aside.

In a bowl mix butter, sugar, apple cider vinegar, vanilla essence , milk and stir properly.

In a big bowl mix all purpose flour, salt, baking powder, baking soda properly and add in the wet ingredients (the butter - sugar- milk  mix ) and mix properly without any lumps. Don't use a hand mixer, just stir everything with a large spoon. Over mixing an eggless batter will cause the cake to deflate after it is baked.

Add more milk if the batter is too thick ( I added 1/4 cup of additional milk ) .

Once you get a smooth batter add in half of the blueberries. [ If using fresh blueberries just wash and add them, if using frozen - do not thaw them as the water from blueberries might change the color. Even though I did not thaw the frozen blueberries, they still let out water and changed the batter color, which is totally okay as it did not affect the final result.]


Preheat the oven at 350 F and grease the baking pan.

Pour the batter over the greased pan and top with the remaining blueberries .

Sprinkle the almond  mix over the cake and make sure that the almonds and blueberries stick to the batter.


Bake for 40 - 50 mins or untill the tooth pick inserted comes out clean.

Even though the cake is very light, it doesn't rise much. I will probably add more vinegar next time.
Flip the cake after 10 mins when warm . Refrigerate while storing.

Serve with coffee / tea.

Happy Bday Amma !!

Tuesday, September 28, 2010

Eggless Milk Powder Cake

Today 28th September, is my Dad's birthday. Here is a birthday wish that comes with lots of love, warmth and heartfelt thanks for all that he has done for me. A very very Happy Birthday Appa - from D and me.
We celebrated my Dad's birthday ( in absentia! ) with an egg less milk powder cake. I specially loved this cake for it close resemblance with the taste of white milk chocolate.


D's mom shared this simple yet tasty recipe with me. The next time I try this cake, I would want to add tutti- fruity or chocolate chips for an extra flavor. Also I usually add vinegar to all my cakes but I didn't add this time, as I was using a lot of milk, I didn't want to curdle it. ( I am not sure if cold milk can be curdled by vinegar, I didn't want to take any chances !) . I have used only 1/2 cup of butter and used an extra 1/4 cup of milk to get the perfect batter. You can substitute the 1/4 cup milk with extra butter also.


Prep Time - 15 mins
Baking time - 30 - 40 mins

Ingredients :

All purpose flour / Maida - 2 cups
Milk powder - 1 cup
Milk - 1 cup + 1/4 cup
Baking powder - 2 tsp
Baking soda - 1 tsp
Vanilla essence - 1 tsp
Sugar - 1 cup  ( I used fine sugar, if not available use powdered sugar )
Melted butter - 1/2 cup
Salt - 1/4 tsp

Procedure :

Pre heat the oven at 350 F and grease your baking dish.

In a big bowl, mix all purpose flour, salt, baking powder and baking soda properly.

In another bowl, mix the melted butter and sugar. Similarly mix the milk and milk powder in a bowl and make sure that the milk powder dissolves completely without any lumps remaining. Add this into the butter-sugar mix. Stir all this properly. Since I used fine sugar I kept doing it till the sugar dissolved completely. To this also add vanilla essence. Give it one final mix and keep aside.

Take the big bowl with all purpose flour / maida and make a well in the center and gradually pour the above mix and stir slowly till you get a smooth batter without lumps. Don't use a hand mixer, just stir everything with a large spoon. Over mixing an eggless batter will cause the cake to deflate after it is baked.

Pour the batter into the baking pan and bake for 30 mins or till an inserted toothpick / knife comes out clean.

Happy B'day Daddy!!

Friday, September 17, 2010

Banana Rye Bread

Banana Rye Bread can be a pleasant change from our regular cereals and breads. Along with the health benefits , this bread tastes good too!


I followed the same recipe of Banana bread and just replaced the all purpose flour with the rye flour. Also I reduced the 1 cup of sugar to approx 3/4th cup of sugar. I felt that I could have reduced the 3 bananas to 2 to get a more rye flavor (thats right, more taste of the rye flour and not of the bananas). If you don't like the rye taste you might want to go ahead with 3 bananas. 

Another important thing to note is the baking time. It took me approx 1 hour and 35 mins to bake this bread so it is strongly recommended that you use a dark bread pan as it will absorb more heat and bake faster.

Sunday, September 12, 2010

Eggless Banana Bread

Today 12th Sep 2010 is my parents 35th wedding anniversary. So, on a sweet note, we would like to dedicate this banana bread recipe to their 35 years of togetherness and wishing many many many more to come.From us- A Very Happy Wedding Anniversary to Appa and Amma.


I have added banana bread to my list of favorite breads. This yumilicious bread is easy to prepare. I would also want to try the healthier versions i.e with buckwheat or rye flour soon. Also, I felt that I could reduce the amount of sugar from 1 cup to 3/4th cup ( that is, if you want to eat the bread for breakfast, you can substitute with the healthier flour and add less sugar )


Prep time - 15 mins
Baking time - 50 mins

Ingredients :

All purpose flour - 2 cups
Bananas - 3 ripe, ( I used banana with few brown dots )
Sugar - 1 cup ( I used fine sugar, if not available use powdered sugar )
Flax seed  powder- 1 tbsp
Milk - 3 - 4 tbsp
Melted butter - 1/4 cup
Salt - 1 tsp
Baking soda - 1.5 tsp

Procedure :

In a big bowl mix all purpose flour, salt , baking soda and flax seed powder properly.

Mash your bananas with a masher into a fine paste. I mashed the bananas using a big spoon and once they were broken into small pieces I then ground them into a fine paste using a mixer.

To this paste add sugar, milk and butter and mix properly.

Now pour this mix into the all purpose flour mixture slowly and mix slowly. The bread batter would be thicker than usual cake batters. The batter should not be very runny but should be thick enough that you can mix it with ease.

Grease a bread pan and preheat the oven at 350 F. Pour the batter into the pan and bake for 50 mins or till an inserted tooth pick comes out clean.

Friday, August 27, 2010

Tiramisu (eggless)

Today, 27th August, is my MIL's birthday. D and myself would like to wish her a very very happy birthday and we are grateful for her ever present love and affection and for everything that she represents! We celebrated in absentia the occasion with a homemade eggless Tiramisu and it turned out really tasty! We just wish we were able to share it with her.


The Tiramisu version that I made, is eggless and made with mascorpone cheese. D loves it a lot, and more so because the coffee flavor is his favorite Breakfast blend!

Tiramisu is made with layers of ladyfinger biscuits and a mascarpone- whipped cream mix.And I made the following changes to my Tiramisu  from the traditional recipe :


1. I replaced the egg in the mascarpone - whipping cream mixture with custard . Custard, just like eggs would help in firming up the cheese and cream.
2. Instead of using lady finger biscuits ( sponge cake with eggs ) i made my own eggless sponge sheets.
3. The traditional Tiramisu recipe uses dessert liquor ( like Marsala wine, Rum, Brandy, Kahlua ). You can instead use unsweetened grape juice.

I referred to Sanjay Thumma's eggless video for Tiramisu, he has used strained yogurt whereas i made my own mascarpone cheese.

I hereby present the full recipe

Ingredients :

For the sponge cake thin sheets :

All purpose flour - 1 cup
Sweetened condensed milk - 7 ounces /198.5 gms [ half can ]
Melted butter - 1/4 cup
Baking powder - 1 tsp
Baking soda - 1/2 tsp
Water - 1 cup

Heavy whipping cream - 8 ounces / 227 gms
Mascarpone Cheese - Refer the recipe by clicking on it
Strong brewed coffee - 1.5 cups
Unsweetened grape juice - 3 to 4 tbsp
Sugar - as per taste ( i used about 1/4 to 1/2 cup )
Cocoa powder - 1/2 cup ( or more as per taste )

For the custard :

Milk - 1/2 cup
Custard powder - 1 tbsp

For Garnishing:

Cocoa powder
Chocolate ( I used mildly sweet Hershey's dark chocolate )

Procedure :

Sponge cake cookie sheets :

Preheat the oven at 350 F and grease a sheet pan ( cookie tray).
In a small bowl mix melted butter, condensed milk and water.
In another big bowl mix all purpose flour, baking powder and baking soda, make a well in between and pour in the condensed milk - butter mix and mix properly.
Pour this batter on the greased tray and spread evenly so that when its baked , we will get a thin sheet of sponge cake.Take a knife and cut it into small strips ( Similar to the ladyfinger biscuits ).


Mascarpone, whipped cream and custard mixture (MWC mixture) :

How to make whipped cream

Take the heavy whipping cream in a bowl, add a tbsp of sugar and whisk  till soft peaks are formed. This should take about 20 mins of heavy whisking.

How to make custard


In a small pan heat milk. Take custard powder and mix it in 3 - 4 tbsp of milk.  When the milk comes to a rolling boil add the custard mix and stir continuously till it thickens. This would take few seconds. Cool the custard.

In a big bowl take mascarpone cheese and mix 3-4 tbsp of sugar and whisk till the cheese becomes soft. Add the whipping cream and custard and mix them well till you get a smooth  mixture . To this mixture add 2-3 tbsp of brewed coffee. Check for sugar , If you want to make your cheese more sweeter, add some more sugar.


Preparing the coffee liquor:

In a bowl mix the strong brewed coffee and 2-3 tbsp of unsweetened grape juice ( or Wine, Rum or Brandy if using ).


Chocolate Shavings for garnishing:

Take the big bar of dark chocolate and with a vegetable peeler shave off to make the chocolate shavings.


Assembling the cake :

Take a serving bowl ( preferably square or rectangle ) in which we will assemble the Tiramisu layers.

1st layer 


Dip the sponge sheets into the coffee liquors ( give a quick dip, like for a second or two. Over dipping would turn the cake soggy and break ) and line them into the serving bowl. Fill out the empty spaces with small pieces of sponge sheets if necessary.


2nd layer

Pour half of the MWC mix over the sponge sheets gently.


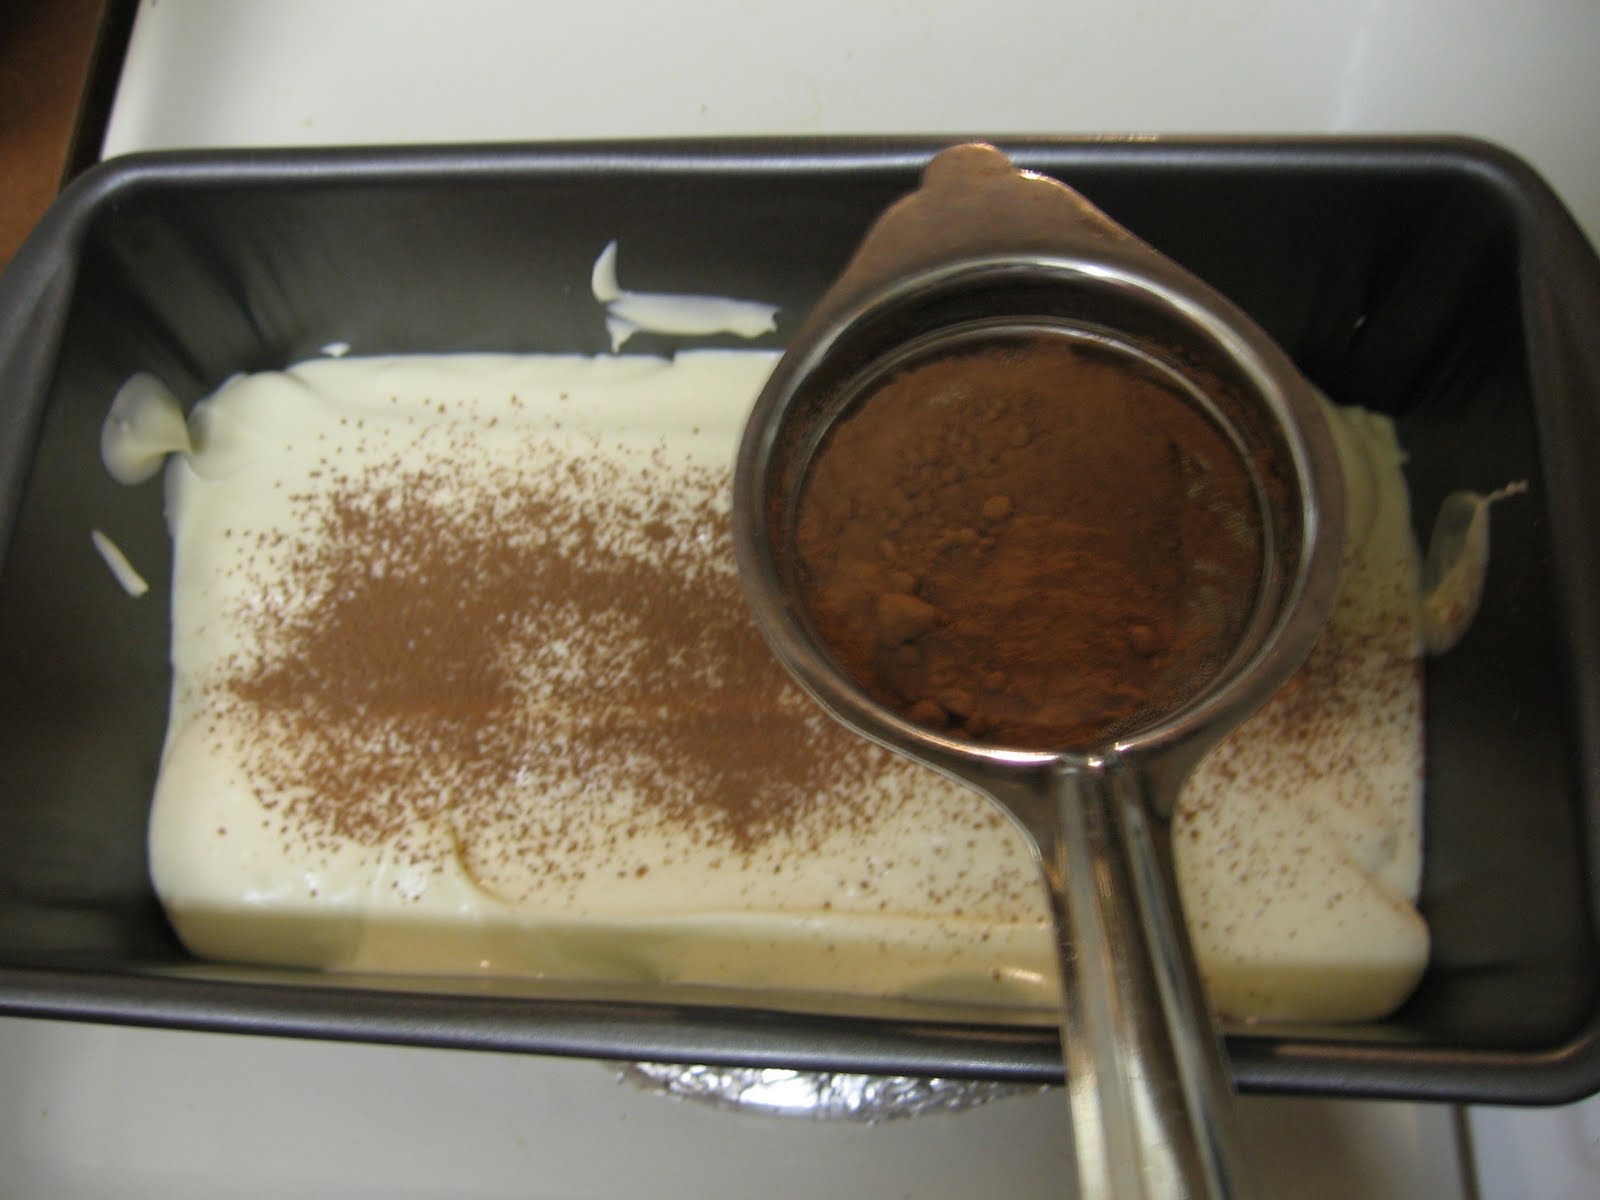
Evenly spread the cocoa powder over the MWC layer with the help of a tea strainer.

 
3rd layer

Take the sponge sheets and give a quick dip in the coffee liquor and line them over the cocoa powder .


4th layer

Pour some more MWC mix over the sponge sheets.


Sprinkle the cocoa powder over the MWC layer with the help of a tea strainer and decorate with chocolate shavings.


Cover with a saran wrap ( plastic wrap ) and refrigerate for 6-7 hours.


Serve chilled . Cutting and serving the tiramisu can be little tricky as the cake is very spongy and creamy. So cut carefully and serve.


Happy b'day again to my mother-in-law!!!!