Showing posts with label Desserts. Show all posts

Tuesday, April 24, 2012

Strawberry Parfait

Both me and D have a thing for strawberries, from strawberry milkshakes to cakes ( read cheesecakes) , from smoothies to ice cream,from fruit bowls with a large amount of strawberries to chocolate icecreams with chunks of strawberries embedded , we always find ways to include them. So it was only obvious that I would be making this small discovery while wanting to enjoy the goodness of fresh strawberries. This recipe would go as a perfect dessert when you want to entertain a group of guests. For this I would recommend frozen strawberries,  store bought concentrates are a strict no no.


Prep time - 10 mins

Serves 2 in medium sized cocktail glasses.

Ingredients:

Strawberries - 11 - 12, frozen
Greek Yogurt - 1/2 cup ( or more as per taste),
Oatmeal cookies - 3 - 4
Sugar - 2 tbsp

For Greek yogurt - Strain the yogurt on a muslin cloth to remove the excess water or whey.


Procedure:

Blend the strawberries and sugar till you get a crumbly homogenous mixture.

Whisk the yogurt to a smooth paste.

Crush the oatmeal cookies with your hands into coarse powder.

Assembling:

In your serving glasses layer with  1 -2 tbsp of strawberry puree, top it up with 3 tbsp ( or less ) of yogurt. Refrigerate and chill. Just before serving, sprinkle the oatmeal cookie crumbs.


Enjoy the chiilled dessert as it slowly melts in your mouth!


Tuesday, April 10, 2012

Dried Fruits Chocolate Truffles

D and me both are really fond of dry fruits,  we always end up adding more than needed for the recipe. On the side, we recently went to a herb Souk in a certain Middle East city and we got excited at the wide variety, quality and most of all enjoyed the taste. In a recent 'brainwave' abetted by an extreme craving for chocolates and dryfruits, I concocted this recipe of a nutty, smooth chocolatey byte! If you have a sweet tooth, then follow me, and drool at the different pictures and head to the kitchen to make and splurge on this delicious, decadent dessert! 


Prep Time - 25 mins

Ingredients :

Almonds -         1/4 cup, roughly chopped
Cashews -         1/8 cup, roughly chopped
Pistachios -        1/4 cup, roughly chopped
Figs -                 1/8 cup, roughly chopped
Golden raisins -  1/8 cup, roughly chopped
Apricots -           1/8 cup , roughly chopped

Heavy cream - 2- 3 tbsp
Butter  -           1 tbsp
Dark chocolate - 200 grams, roughly chopped

Procedure :

Dry roast the almonds, cashews and pistachios for 2-3 mins or till you get a nice aroma. Cool and ground it to a coarse mixture. Separately grind the figs, apricots and raisins to a coarse paste. 


Take a large pan and add water ( for double boiling method) . When the water starts boiling, place a bowl with cream and butter till you get a homogenous mixture. Add in the chopped chocolate and keep stirring continuously till the chocolate melts. Give it a good mix again and turn off the heat. Transfer all the contents to a big mixing bowl and add the dried fruits. Mix it with your hand till the dried fruits get incorporated into the melted chocolate fully. Take small portions and roll them into truffles. If you find it difficult to roll them , store the mixture in refrigerator for 10 mins and then roll.


Alternatively you can just mix the dried fruit mixture and roll them into small balls ( the figs, apricots and raisins mix will help bind the other dried fruits ) and dip those into the melted chocolate, but I prefer the first method where i get dried fruits and chocolate in every bite.


You can further roll these truffles in cocoa powder. Or one can melt white chocolate and decorate with simple words or just plainly drizzle on them. There are lots of ways to play around and make your truffles a success.

Store in refrigerator and serve. Can even be kept for  a week!

Wednesday, January 5, 2011

Semiya Payasam / Seviya Kheer

New year a new decade and a new sweet post ! Semiya payasam / Seviya kheer comes real handy on those days when you want to make a rich flavourful sweet dish ( with lots of dry fruits) and yet is very easy to prepare. D's mom shared this delicious sweet dish in detail. This dish can be had on many festive occasions and would definetly be a sure shot success.

Prep time : 5 mins
Cooking time: 15 mins

Ingredients :

Semiya / Vermicilli - 1 cup
Sugar - 1 and 1/4 cup
Water - 1 cup + 1/4 cup ( if required )
Milk - 2 cups
Ghee - 2 tbsp
Cashew nuts - 1 tbsp ( broken )
Raisins - 1 tbsp
Elaichi - 2 nos, roughly powdered
Saffron - 3-4 strands (optional )
Yellow color - 1/8 tsp

Procedure :

Soak the saffron ( if using) in a tbsp of milk 20 mins prior to cooking. If you forget soaking it, just microwave the saffron with a tbsp of milk for 30 seconds ( this also works! )

Take a small pan on medium heat, heat a tbsp of ghee and fry the raisins and cashews respectively ( fry them seperately, else the raisins might get burnt as they get cooked faster ). In the same pan heat the remaining ghee and add the semiya / vermicilli and roast on medium - low heat till it gets a nice golden brown color ( This should approx take 8 - 10 mins ).

Once the vermicilli turns golden brown add one cup of water. Stirring in between , wait till the water comes to a boil ( the vermicilli / semiya would be half cooked ) . Pour the 2 cups of milk and again wait till it comes to a boil, stirring in between ( approx 5 mins on low- medium heat ). Buy this time the semiya/ vermicilli would have plumped up. Now add the sugar and stir in between till the sugar melts completely. At first, after adding the sugar, the payasam / kheer might look watery. Let it boil for 5 mins till you get a homogenous consistency. Again if the kheer looks very thick add some water and let it boil. At this stage add the dry fruits, yellow color, saffron ( if using ) and elaichi. Allow it to boil.

Can be served hot / chilled.

Wednesday, December 15, 2010

Eggless/ Vegetarian Strawberry Cheesecake With Chocolate Ganache

 We celebrated D's birthday on 10th December with friends. For his special day I decided to make Strawberry Cheesecake with Chocolate Ganache, and this rich festive cake was my way of showing him that he is very special . Thank you for making my every passing day a memorable yesterday !


I had set my eyes on a cheesecake long time back, but all the recipes called for using either eggs or gelatin .
[ Cheesecakes that require baking use eggs, whereas the " no bake " cheesecakes use gelatin to firm them up ]. Us being staunch vegetarians, I decided that I would figure out a way to make my cake egg/gelatin less. Then I stumbled upon Rosemarie Emro's cheesecake recipe called  "I cannot believe it has no eggs cheesecake " [ where she replaces the eggs with condensed milk]. I followed her recipe for a basic cheesecake and then made my own minor changes to it. The resulting cake was super creamy, dense and undoubtedly rich with a slight tart of strawberries and a must try at home.

Since I was new to making cheesecakes I did some research and would like to share my notes on the same, they are as follows :

1. Springform Pan - Cheesecakes are very soft and somewhat fragile and not the type of cake you can turn out of a pan. This calls for using a springform pan, where you can lift away the sides and leave the cake on pan's base for serving!

2.Avoid overbeating the cream cheese batter as it tends to incorporate air which in turn could cause the cheesecake to crack.

3.For best results pre bake the crumb crust for 10 mins before baking the crust along with the cake.

4.Unmolding the cake - The best way for removing the cake from the springform pan , is by running a blunt knife ( dipped in hot water and wiped before use ) around the cake in an up down motion.

5. Just like baking, cooling ( at room temperature) and the chilling in a refrigerator are important steps in making a cheesecake.

6. The cheesecakes have a tendency to crack, baking the cheesecakes in double boiling method prevents it from cracking and  I followed this method. But since the recipe uses corn starch ( corn starch prevents coagulation , which in turn prevents the cake from cracking ) double boiling is not required.


I hereby present the full recipe

Prep Time : 30 mins
Baking time : 1 hr 30 mins
Inactive setting time : 12 - 18 hrs

Ingredients :

For the Crust :

Chocolate graham crackers - 20 - 25 pieces ( should yield 1.5 cups when crushed into crumbs )
Melted unsalted butter - 1/2 cup
Fine sugar - 2 tbsp

For the Cheesecake Filling :

Regular cream cheese - one 8 ounce package (226 gms)
Low fat cream cheese - two 8 ounce package (= 16 ounces )
Pureed fresh strawberries - 1 cup
Sweetened condensed milk - 1/2 cup
Fine sugar - 1/2 cup
Baking soda - 1/4 tsp
Baking powder - 2 tsp
Cornstarch - 1/4 cups
Lemon juice - 1 tbsp
Grated lemon rind - 1/2 tsp
Vanilla extract - 1 tbsp
Light sour cream - 16 ounces

For the Chocolate Ganache :

Heavy whipping cream - 186 ml
Semi- sweetened chocolate - 8 ounces [ I used Baker's brand ]
Butter - 2 tbsp

One hour prior to preparing : Bring the cream cheese at room temperature by taking it out from refrigerator.

Procedure :

Grease the springform pan with butter. Choose a pan that has sides atleast 3 inches high.


Crust :

In a medium sized bowl break the graham crackers into small pieces using your fingers.  Powder the pieces in a blender. Mix the cracker crumbs with melted butter and sugar until all of the crumbs are uniformly moist. ( I did this with my fingers )  Turn the ingredients into the springform pan.


Use a flat surfaced bowl to pat an even layer of crumbs over the bottom of pan and halfway up the sides.
Its okay if the sides are not perfectly even.


Place the wire rack in the centre slot in the oven and preheat the oven at 350 F. Put the springform pan with the crumb layer in the freezer while you preheat the oven. After 10 mins place the springform pan in the oven and bake for 10 mins. Remove from the oven and set it aside.


Reduce the oven temperature to 325 F. Put a kettle of water on boil. Wrap the bottom and sides of the the springform pan with double layers of aluminum foil.

Cheesecake filling :


In a large bowl , with a handheld electric mixer on low speed, beat all the cream cheese and condensed milk together. Slowly add in sugar, baking soda, baking powder, corn starch , lemon juice, lemon rind and vanilla essence. Mix till you get a homogeneous mixture. Pour in the pureed strawberries and beat until you get a smooth mix.  Mixing of all the ingredients mentioned above should take approx 3 minutes. Do not over beat the mixture. At this stage add sour cream and blend at the lowest speed till you get a smooth mixture. Pour this mixture into the prepared pan. The batter will reach just below the top rim of the pan.


Baking: 

Now place the foil wrapped springform pan on a baking sheet that is large enough to hold the pan with some space around it. Pour enough boiling water around the pan.

Place this whole set up in the centre rack of the preheated oven. Bake for 1 hr and 30 mins .


Its difficult to gauge when a cheesecake is done as it will never appear like its done. Switch off the oven when your cheesecake appears set and the centre is wobbly.

[ The cake would first rise above the rim, then go down and the top layer would appear brown. As soon as you see the above changes in your cheesecake be alert and hit the rim of the springform pan with a big spoon, if the whole cake looks wobbly heat for some more time. Whereas if the sides look set and the centre still looks wobbly ( when you hit the rim slowly with a big spoon ) switch off the oven ]

The whole process took me about 1 hr and 30 mins. This time would vary depending upon the oven capacity.

Let the springform pan sit inside the oven for one more hout after it is switched off. After 1 hour , carefully pull out the set up from the oven. Remove the foil from the sides of springform pan and let the cheesecake come to room temperature.

Once when the cake reaches room temperature, cover it with a saran wrap ( or any plastic wrap ) and refrigerate overnight ( or 6-7 hrs minimum ).

After the cake has been chilled overnight, remove the sides of springform pan by running a blunt knife ( dipped in hot water and wiped) to separate the cake from the side walls of the pan and unlocking it.


Chill it again while you prepare chocolate ganache.

Chocolate Ganache :

 Chop the chocolates as finely possible and place them in a stainless steel bowl.

In a strong bottomed pan, heat butter and whipping cream on medium heat till they start to boil. Switch of the heat and pour the boiling whipped cream - butter mix over the chopped chocolate. Let it rest for 2 mins. Using a whisk mix the chocolate and whipped cream mix till you get a smooth shiny mixture.

Take out your cake from the refrigerator and place it over a butter paper (the ganache might drip). The top layer of the cheesecake might not be even, so to make the top layer smooth spread 2 tbsp of the ganache on the crumbly spots with a rubber spatula. Refrigerate the cake with the crumb coat for 5 mins.
After 5 mins when you take it out , you would have a smooth surface to work on.Now pour the  remaining ganache in the centre and spread quickly with a rubber spatula over the sides of the cake evenly.


Refrigerate the cheesecake with chocolate ganache for 2-3 hrs.[ Refrigerating the cake with the ganache for more than 2-3 hrs might make it dull without glaze, so prepare it just before 2-3 hrs of serving your cake! ]


Happy Birthday again D!

Saturday, December 4, 2010

Chocolate Dipped Strawberries

Plain strawberries are good, but whats' really good is strawberries dipped in chocolate! In this particular recipe, I have used the Bakers brand of semisweet and white chocolates. One of the challenges here is to get the right kindof strawberries - sweet and plump. Three tips for selecting strawberries - they should be checked for uniformity of the seeds at their base, whether they are bright red (not too much/too little though) and moldfree.


Prep time - 10 mins

Ingredients :

Strawberries - 14, with stems, washed and dried
Semi sweet baking chocolate - 6 ounces [ I used Baker's brand ]

Drizzle (for garnishing and added taste) :

White chocolate baking squares - 2 ounces [ I used Baker's brand ]
Oil - 1/2 tsp


Procedure :

In a small microwaveable bowl, microwave the semi sweet chocolate while stirring at 30 sec intervals till it melts completely. Else melt the chocolates using the double boiling method [ Take a large pan and heat water till it comes to a rolling boil , turn the heat to low. In another bowl place the chocolate squares and place this bowl over the large pan with water. Keep stirring till the chocolate melts ]

Take a plate and cover it with butter paper. Dip the strawberries into the melted chocolates and place over the butter paper. [ If you dont use butter paper the chocolate might get smeared onto the plate.]

In a small microwaveable bowl melt white chocolate, stirring at intervals of 30 seconds. Once its melted add oil and mix again. Drizzle over the chocolate coated strawberries. [ You can also do vice  versa i.e coat the strawberries with white chocolate and drizzle semisweet chocolate ( mixed with oil ) over them].

Let them cool till the chocolate sets , I refrigerated the same to set the chocolate faster.

Monday, November 1, 2010

Ummali - An Egyptian Pudding


Today (Nov 1st) is my SIL’s first wedding anniversary! We would like to wish M and K both on this special day, and hope they have a great day and many more such wonderful years ahead. To celebrate this occasion I made a middle-eastern pastry dish known as ummali and would like to dedicate this to a long lasting relationship filled with love and companionship.

Out of the wide range of Middle Eastern desserts, I zoned in on three – Basbousa, Ummali and Baklava. I chose to make Ummali, mainly for the exotic, coconutty-crunchy-chewy and nutfilled flavor in a mix of baked pastry sheets. It loosely resembles a bread pudding, but is not very sweet and hence we can have it in large serving sizes.

This dish is also popularly known as umali or omali.


Prep time: 10 mins
Total baking time: 30 – 45 mins

Ingredients:

Phyllo pastry sheets – 8 ounces / 227 grams [store bought]
Almonds – 1/4 cup, chopped
Pistachios – 1/4 cup chopped
Raisins - 1/4 cup chopped
Dry coconut flakes – 4 tbsp [or as per taste]
Sweetened condensed milk - 7 ounces/ 198.5 grams
Milk – ¾ cup
Vanilla extract or rose water – 1 tsp [ I used vanilla extract ]

Procedure:

Preheat the oven at 350 F and slightly grease cookie tray with oil.

Line up all the pastry sheets (one over another) on the cookie tray and bake till the sheets puff up and turn golden in color. This should take approx 15 mins and make sure that the sheets don’t burn.

Once they turn golden brown, turn off the oven. Take out from the oven cool and break into pieces.

Grease your baking pan [the one in which you would serve] lightly. Place the pastry pieces into the pan and this would be the first layer.

In a small bowl mix almonds, pistachios, raisins and coconut properly. Sprinkle this mixture evenly over the pastry pieces, thus forming the second layer.


Now, in a small bowl, mix condensed milk, milk and vanilla essence [or rose water] properly. Once mixed properly cook this mix on medium heat for 2-3 minutes stirring continuously. Once hot, pour this mix over the dry fruits evenly. 


Again preheat the oven at 350 F and place the pan in the oven and bake for 20 mins or till the layers become firm. Once the layers firm up, turn off the oven and set in broiler mode for 2-3 mins [or till the top layer becomes slightly brown]. Make sure that that the top layer does not get burnt. 

Ummali is a wholesome dessert by itself. You may also serve it with fruits or even ice cream !

Happy Wedding Anniversary!

Monday, October 11, 2010

Carrot Halwa / Gajar ka Halwa

It is Navratri time and with the leaves changing their colors and winter around the corner, I couldn't resist making some nice warm carrot halwa. 

Prep Time - 20 mins
Cooking time - 40 mins

Ingredients :

Carrot -  5 cups, grated,
Milk - 3 cups approx
Paneer - 1/2 cup, roughly grated
Dry fruits ( almonds, cashews and raisins) - 1/2 cup
Butter - 1-2 tsp
Sugar - 1 cup [ or as per taste ]
Cardamom powder - 1/4 tsp

Procedure :

In a big wok , melt the butter ( on medium heat ) .  Add in the dry fruits and stir till the raisins puff up. [ do not worry about frying the almonds and cashews as it will get cooked later ]

Now add in the carrot and mix . Add in the milk and cook till the carrots gets cooked and the milk is fully absorbed. [ Alternatively you could also cook in a pressure cooker to cook the carrots faster ]
At this point add in the sugar and again cook till the butter starts to ooze out of the carrot.

Add in the paneer and stir. Sprinkle cardamom powder. Mix and serve warm.

Friday, August 27, 2010

Tiramisu (eggless)

Today, 27th August, is my MIL's birthday. D and myself would like to wish her a very very happy birthday and we are grateful for her ever present love and affection and for everything that she represents! We celebrated in absentia the occasion with a homemade eggless Tiramisu and it turned out really tasty! We just wish we were able to share it with her.


The Tiramisu version that I made, is eggless and made with mascorpone cheese. D loves it a lot, and more so because the coffee flavor is his favorite Breakfast blend!

Tiramisu is made with layers of ladyfinger biscuits and a mascarpone- whipped cream mix.And I made the following changes to my Tiramisu  from the traditional recipe :


1. I replaced the egg in the mascarpone - whipping cream mixture with custard . Custard, just like eggs would help in firming up the cheese and cream.
2. Instead of using lady finger biscuits ( sponge cake with eggs ) i made my own eggless sponge sheets.
3. The traditional Tiramisu recipe uses dessert liquor ( like Marsala wine, Rum, Brandy, Kahlua ). You can instead use unsweetened grape juice.

I referred to Sanjay Thumma's eggless video for Tiramisu, he has used strained yogurt whereas i made my own mascarpone cheese.

I hereby present the full recipe

Ingredients :

For the sponge cake thin sheets :

All purpose flour - 1 cup
Sweetened condensed milk - 7 ounces /198.5 gms [ half can ]
Melted butter - 1/4 cup
Baking powder - 1 tsp
Baking soda - 1/2 tsp
Water - 1 cup

Heavy whipping cream - 8 ounces / 227 gms
Mascarpone Cheese - Refer the recipe by clicking on it
Strong brewed coffee - 1.5 cups
Unsweetened grape juice - 3 to 4 tbsp
Sugar - as per taste ( i used about 1/4 to 1/2 cup )
Cocoa powder - 1/2 cup ( or more as per taste )

For the custard :

Milk - 1/2 cup
Custard powder - 1 tbsp

For Garnishing:

Cocoa powder
Chocolate ( I used mildly sweet Hershey's dark chocolate )

Procedure :

Sponge cake cookie sheets :

Preheat the oven at 350 F and grease a sheet pan ( cookie tray).
In a small bowl mix melted butter, condensed milk and water.
In another big bowl mix all purpose flour, baking powder and baking soda, make a well in between and pour in the condensed milk - butter mix and mix properly.
Pour this batter on the greased tray and spread evenly so that when its baked , we will get a thin sheet of sponge cake.Take a knife and cut it into small strips ( Similar to the ladyfinger biscuits ).


Mascarpone, whipped cream and custard mixture (MWC mixture) :

How to make whipped cream

Take the heavy whipping cream in a bowl, add a tbsp of sugar and whisk  till soft peaks are formed. This should take about 20 mins of heavy whisking.

How to make custard


In a small pan heat milk. Take custard powder and mix it in 3 - 4 tbsp of milk.  When the milk comes to a rolling boil add the custard mix and stir continuously till it thickens. This would take few seconds. Cool the custard.

In a big bowl take mascarpone cheese and mix 3-4 tbsp of sugar and whisk till the cheese becomes soft. Add the whipping cream and custard and mix them well till you get a smooth  mixture . To this mixture add 2-3 tbsp of brewed coffee. Check for sugar , If you want to make your cheese more sweeter, add some more sugar.


Preparing the coffee liquor:

In a bowl mix the strong brewed coffee and 2-3 tbsp of unsweetened grape juice ( or Wine, Rum or Brandy if using ).


Chocolate Shavings for garnishing:

Take the big bar of dark chocolate and with a vegetable peeler shave off to make the chocolate shavings.


Assembling the cake :

Take a serving bowl ( preferably square or rectangle ) in which we will assemble the Tiramisu layers.

1st layer 


Dip the sponge sheets into the coffee liquors ( give a quick dip, like for a second or two. Over dipping would turn the cake soggy and break ) and line them into the serving bowl. Fill out the empty spaces with small pieces of sponge sheets if necessary.


2nd layer

Pour half of the MWC mix over the sponge sheets gently.


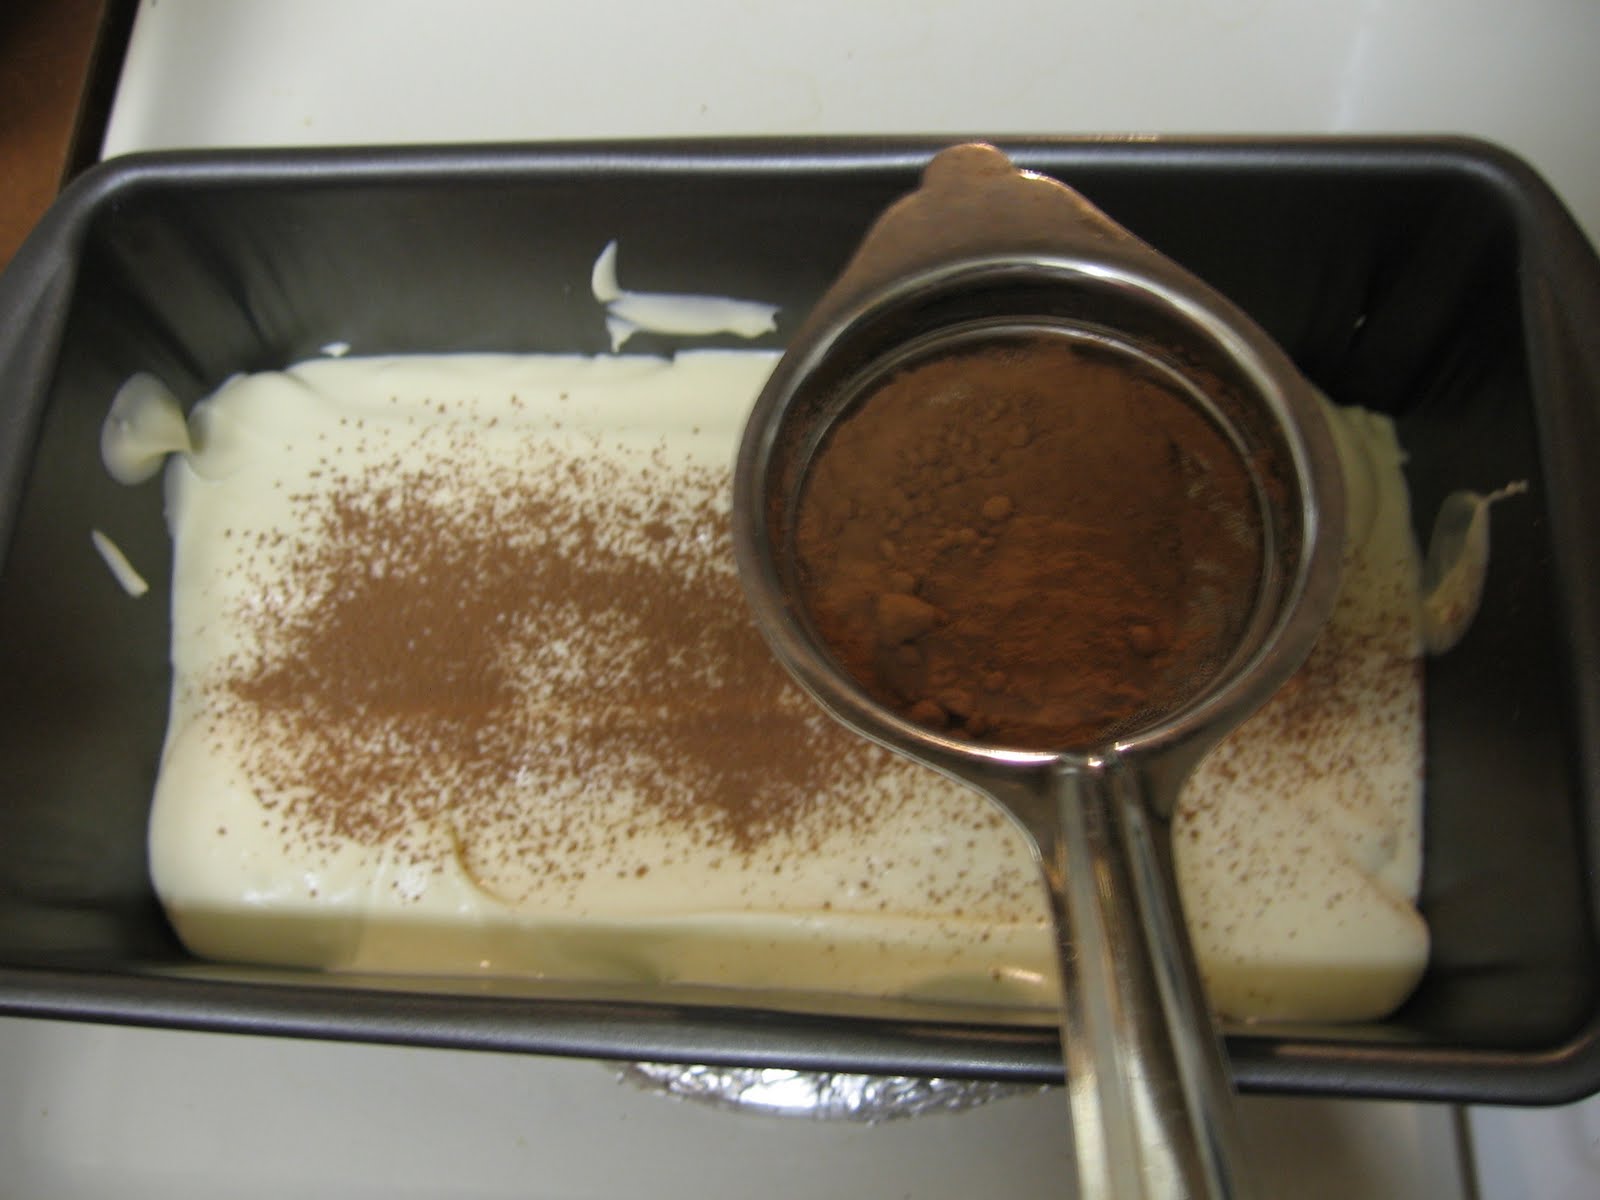
Evenly spread the cocoa powder over the MWC layer with the help of a tea strainer.

 
3rd layer

Take the sponge sheets and give a quick dip in the coffee liquor and line them over the cocoa powder .


4th layer

Pour some more MWC mix over the sponge sheets.


Sprinkle the cocoa powder over the MWC layer with the help of a tea strainer and decorate with chocolate shavings.


Cover with a saran wrap ( plastic wrap ) and refrigerate for 6-7 hours.


Serve chilled . Cutting and serving the tiramisu can be little tricky as the cake is very spongy and creamy. So cut carefully and serve.


Happy b'day again to my mother-in-law!!!!